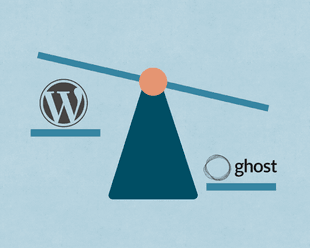
Often we come across the question is it possible to use Ghost to launch a simple landing page. It seems to come up frequently in forums and various places around the web, but usually people have a similar reaction: Why would you want to use Ghost for a landing page? Isn’t that overkill?
But when you give it some more thought, it does really make sense in certain situations to use Ghost for your landing page.
Here are a few reasons:
- No Need to Migrate Later - if you use a simple landing page generator like Cardd or Mailchimp, you will need to migrate later once your launch your full site
- Member Management - if you are launching something that needs to keep track of members (like a paywall or community) you can start creating your members in Ghost from Day 1
- Cost - compared to some tools out there, Ghost has a similar price and may even be cheaper - especially if you are hosting it yourself on a $5 Digital Ocean droplet
- Attached Blog - you can add a couple of blog posts to your landing page to drive organic traffic, even if you’re not fully live yet
- Built-in Email Capture and Sending - with Ghost it just works out of the box to collect emails and you can start sending emails right away to your subscribers
- Integrations - Ghost has lots of built-in integrations that let you take specific actions with everyone who signs up on your landing page. You could send all of your subscribers to Airtable using Zapier or sync them with Mailerlite or Mailchimp using our Automation Hub
And really, the only downside is that you might be using a tool that is too powerful for what you need. But as long as you can keep the configuration to a minimum, is that really an issue?
That’s the goal of this guide, to show you step-by-step how you can build a landing page using Ghost with as little configuration as possible. And if you want to just skip ahead to the template, you can grab that for free here.
Here’s what we will cover:
- Basic setup of your Ghost site
- Configuring Ghost’s Routes
- Splitting the Blog from the Landing Page in Your Ghost Theme
- Finishing Touches on Our Ghost Theme
Let’s dive in.
Basic Setup of Your Ghost Site
First, we need a Ghost site up and running that we can use as our landing page. I won’t go into too much detail here, there are essentially two main options:
- Ghost Pro - this is the official hosting service offered by Ghost that has great service and gives you everything out of the box. The downside is, however, that you cannot use a custom theme on their most basic pricing tier, so hosting will start at $30/month
- Self-Hosted - with this option you will install your own Ghost instance on a service like Digital Ocean, which starts at $5/month. Much more reasonable compared to landing page builders out there like Cardd.
If you are planning to quickly build out your landing page into something bigger in a short period of time, it might make sense to go directly to Ghost Pro. However, if you are comfortable with a bit of configuration and are looking to minimize costs, the self-hosted option is probably your best bet.
If you go down the self-hosted route, you find instructions on how to set up Ghost on Digital Ocean here.
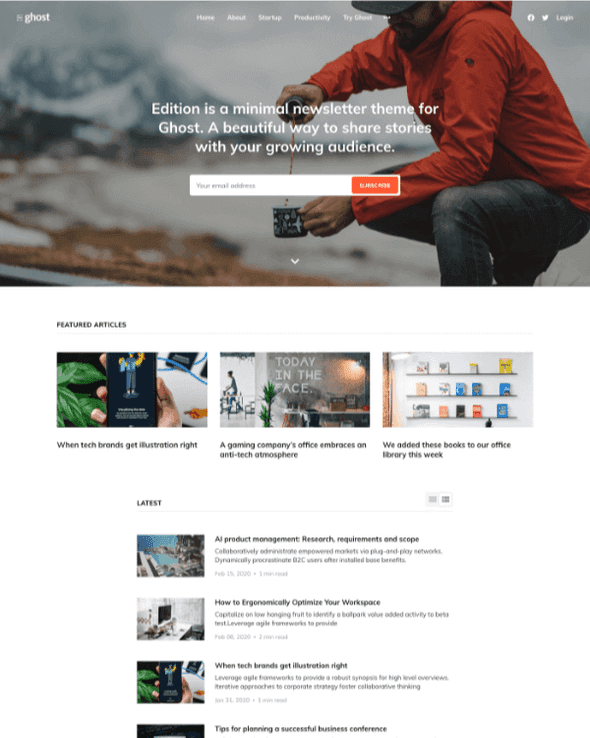
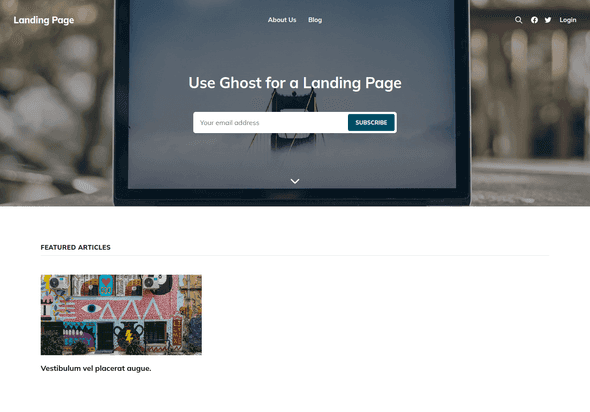
Once you have Ghost set up and you’re able to access your admin dashboard, we are going to go ahead and install the Edition theme. This is an official theme that comes with Ghost by default and looks something like this:
We will be using that theme as a starting point for our landing page. Now we’re ready to get into the more technical details.
Configuring Ghost’s Routes
Next, we need to configure the Ghost’s routes.yaml file. Without getting into too much detail about Ghost’s routing, this file essentially gives you control over what pages on your site have access to different collections of posts as well as what pages appear at different URL’s.
By default, in most Ghost themes including Edition, all of your blog posts will be available to your site’s homepage which creates that list of articles. But since we want to remove that list of articles from the homepage to create a landing page effect we need to move them somewhere else. We can do that by editing our routes.yaml file.
We will do that first by downloading it from Settings > Labs.
Then we will open it up and change it to this:
routes:
  /: home

collections:
  /blog/:
    permalink: /blog/{slug}/
    template: index
This is saying that we want our blog posts to live at the /blog/ URL using a template called index, while we want our homepage / to have no posts attached to it and use a template called home.
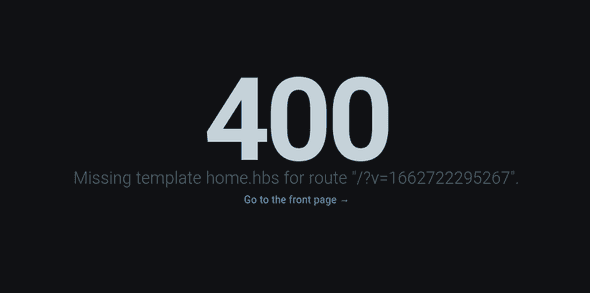
We can go ahead and upload that back into our Ghost dashboard. Now if we try to navigate to /blog/ we will see what used to be our homepage and if we navigate to the main page, we will get an error. That’s because we don’t have a page template called home yet.
In the next step, we will create that home template by splitting the hero image and call to action away from our blog page and using that as our landing page.
Splitting the Blog from the Landing Page in Your Ghost Theme
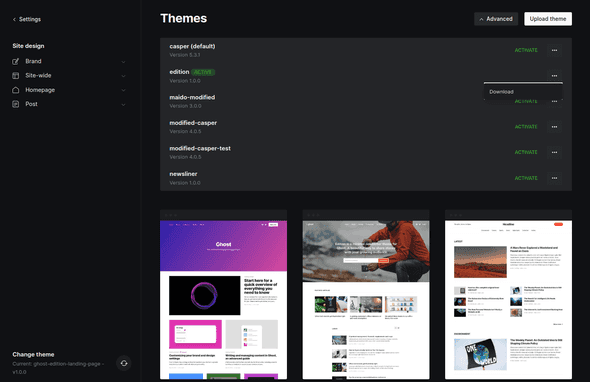
First, we need to get our theme to a place we can work on it, so we will go ahead and download it from our admin dashboard in Ghost:
Then we will open it up and add a file called home.hbs. This is creating the missing home file that we are referencing in our routes.yaml.
In our home.hbs file we will then paste in this code:
{{!< default}}

<main class="site-main">

</main>

{{#contentFor "body_class"}}{{#if @site.cover_image}} with-full-cover is-head-transparent{{/if}}{{/contentFor}}
This code is essentially doing three things:
- It is saying we should use all of the code from our
default.hbsfile (which is basically the layout and header of the theme) - We are adding an empty main container as a placeholder - we could put additional content for our landing page here later, but for the purposes of this guide we just want our hero image and call-to-action
- The last bit of code is saying that if we have a cover image uploaded to Ghost, it will cover the entire page and make our header transparent for this page (which is exactly what we want)
Now keeping in mind that last point - this means that any place that code is present our header will be transparent if there is a hero image. By default, our index.hbs file has that code since it was originally our homepage, so we want to go ahead and remove it from there.
So it used to look like this:
…
   {{pagination}}

</main>

{{#contentFor "body_class"}}{{#if @site.cover_image}} with-full-cover is-head-transparent{{/if}}{{#if @member}} logged-in{{/if}}{{/contentFor}}
Now it will look like this:
…
   {{pagination}}

</main>
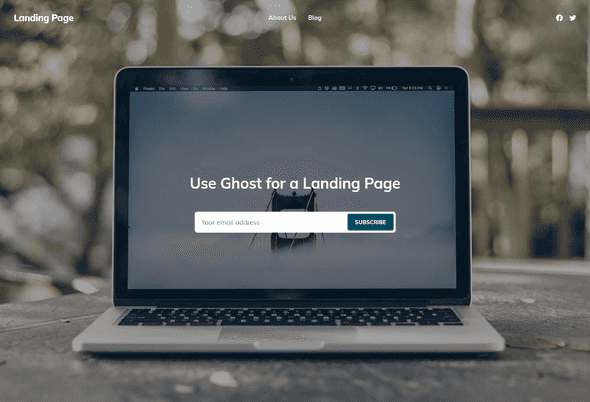
And with that, we have successfully split our landing page away from our blog page. Our landing page now looks like this:
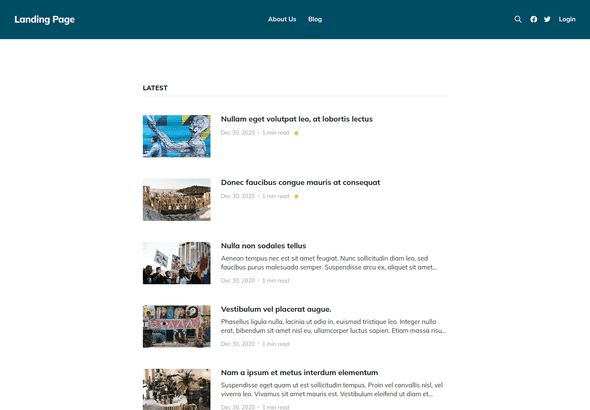
And our blog page looks like this:
Ghost Theme Finishing Touches
You will notice that although this has achieved our goal of splitting the blog page away from our home landing page, but we have a few things that we will probably want to remove to keep things as clean as possible.
First, since we don’t have any content on our landing page, let’s try to fit everything onto a single page.
To do that, we will need to:
- Remove the featured post section
- Remove the additional spacing
- Remove the footer
All of these are pretty simple changes. To remove the featured post section and the footer, we will go into our default.hbs file and remove this code:
{{#if @custom.show_featured_posts}}
  {{> "featured-posts"}}
{{/if}}
That removes our featured posts. Then to remove our footer we will change our footer code in the same file from:
<footer class="gh-foot gh-outer">
     <div class="gh-foot-inner gh-inner">
         <div class="gh-copyright">
             {{@site.title}} © {{date format="YYYY"}}
         </div>
         <nav class="gh-foot-menu">
             {{navigation type="secondary"}}
         </nav>
         <div class="gh-powered-by">
             <a href="https://ghost.org/" target="_blank" rel="noopener">Powered by Ghost</a>
         </div>
     </div>
 </footer>
To this:
{{^is "home"}}
   <footer class="gh-foot gh-outer">
        <div class="gh-foot-inner gh-inner">
            <div class="gh-copyright">
                {{@site.title}} © {{date format="YYYY"}}
            </div>
            <nav class="gh-foot-menu">
                {{navigation type="secondary"}}
            </nav>
            <div class="gh-powered-by">
                <a href="https://ghost.org/" target="_blank" rel="noopener">Powered by Ghost</a>
            </div>
        </div>
    </footer>
{{/is}}
Here we are just wrapping our footer in an is block, using the ^ symbol to make it the opposite. So, we are saying that our footer will only be served if we are not on the home page.
Finally, we just want to get rid of the extra spacing that was separating our hero image from our blog posts, so we will just go into our layout.css file and change the .site-content class from:
.site-content {
  flex-grow: 1;
  padding: 6vmin 0;
}
To:
.site-content {
  flex-grow: 1;
}
Then as a couple of last finishing touches, we will just remove things that we don’t really need for our landing page. (although you are welcome to leave these things in if you prefer)
We will remove the member login from our header by removing this code from default.hbs:
{{#if @member}}
     <button class="button-text menu-item members-account" data-portal="account">Account</button>
 {{else}}
     <button class="button-text menu-item members-login" data-portal="signin">Login</button>
 {{/if}}
Then we will also remove the search icon from our header by removing this code from default.hbs:
<button class="gh-search gh-icon-btn" data-ghost-search>{{> "icons/search"}}</button>Finally, we will remove the little down arrow that used to scroll down to our blog section. To do that we will remove this code from cover.hbs:
<button class="button-icon cover-arrow">
     {{> "icons/caret-down"}}
 </button>
And this code from main.js:
document.querySelector('.cover-arrow').addEventListener('click', function () {
     var element = cover.nextElementSibling;
     element.scrollIntoView({behavior: 'smooth', block: 'start'});
 });
This removes the actual down arrow itself, as well as the Javascript code that made it scroll down on a click.
With that, we have a nice clean and simple landing page where we can collect email signups right away as well as a separate blog index page if we want to add a few blog posts.
Wrapping Up
We hope you enjoyed this quick tutorial on how to build a landing page in Ghost by converting the Edition theme. You can grab the final code and theme here.
Scale your Ghost site with our automation hub
Simple automation recipes for Ghost that you can turn on with the flip of a switch. No configuration required.
